

How To Add A Caption In Photoshop

Are you looking for an piece of cake way to add together text to your photos? You may already be set up to do that…with Photoshop! Many photographers probably overlook using Photoshop as a way to add text to their photos, since they use information technology mainly for editing photos but just every bit easily every bit you can practise photo editing in Photoshop, you tin can add text.
The wide range of formatting and styling options in Photoshop get in useful for more than just embedding captions in your images. You tin can create things like website banners, advertisements, postcards, invitations, memes…well, I won't judge you lot if you create memes although I'm sure they'll be epic! Here are several steps to help guide you to making things like holiday family photos or New year's day's invitations that go to the next level.
Open your Epitome
Of course, the offset thing to do is open up your image in Photoshop. The common style is to open it directly from Photoshop by selecting File > Open, and navigating to the photo you want to open. You can as well get your image into Photoshop from Lightroom by correct-clicking the epitome in the filmstrip and selecting Edit In > Edit in Adobe Photoshop. One time you finish all the text edits in the prototype, just save it so that the edited image returns dorsum to Lightroom. Y'all'll want to brand sure all the post-processing on your photograph is complete before calculation text. If not, doing any boosted post-processing may compromise the sharpness of the text you added to the image.
Add together your Text
In the tools console, which by default is the vertical tool bar on the left side of the workspace, yous'll want to select the Blazon tool. One time selected, click on the image you opened where you want to add your text, and type it in. You'll also find that a text layer is created, representing the text you simply added.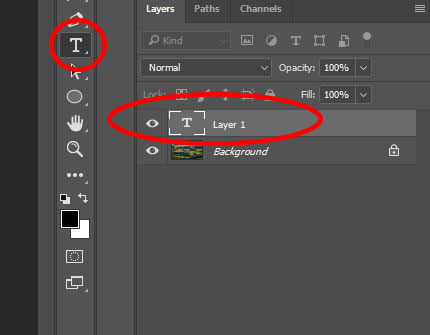
If you need to motility the text y'all created to a unlike part of the epitome, you can hover over the text box until you run into the mouse pointer change to the movement tool, or y'all tin can select the Move tool from your tools panel. Then, just click and drag the text box to the location you want to identify it.
You lot can besides create multiple text boxes on the same image, which volition give you the power to format and stylize each text box separately. Each text box will have its own text layer and then when you want to move or format/stylize your text, make sure the right text layer is selected for what you desire to work on.
Format your Text
There are several ways that you tin format your text to alter the font, size, colour, and other styles. Once yous click on your image to begin typing your text, the formatting options available in the tool bar on the top of the workspace will activate. The common formatting options are found on the tool bar, but those aren't the only options that you have at your disposal.

You lot tin discover additional formatting options by selecting Window > Paragraph and Window > Character. While the Paragraph options typically cater to paragraph content, some of the additional options such every bit alignment/justification, indentation and spacing before and after the paragraph, may be useful for shorter text also. The Character options volition give y'all additional formatting options such every bit text calibration, language, superscript, subscript, and more.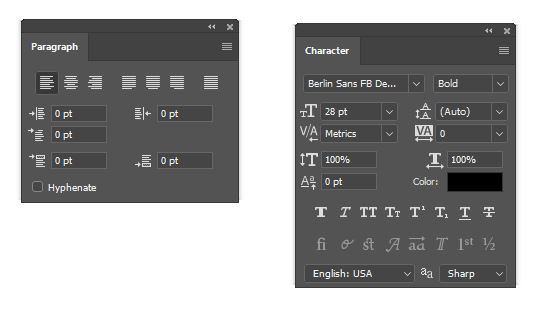
Stylize your Text
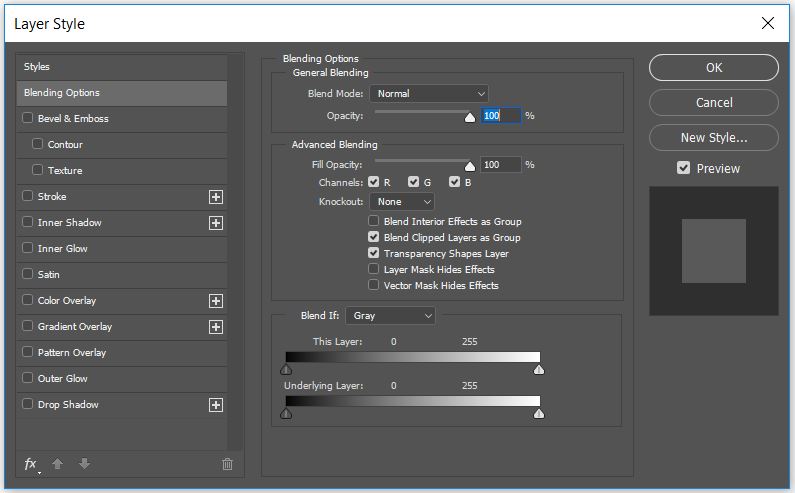
There are several blending options that can make your text stand out even more than. You can get to these options by right-clicking the text layer for the text you desire to stylize, and select Blending Options. In add-on to changing how the text blends into your image, y'all tin can also choose from several style options such as embossing, shadows and many others.
Right-clicking the Type tool in the tools panel will give you a few boosted ways to layout your text. By default, the Blazon tool enables typing text horizontally. Right-clicking will give you the ability to select vertical typing, and will likewise let you lot practice horizontal or vertical type masks. Type masks let you to type text onto the image, and information technology turns that text into an agile selection (marching ants) which you can then use on the paradigm no differently than you would with other active selections.
The Blazon tool only gives y'all the ability to add text vertically or horizontally, but yous may want to have the text laid out differently than that. To rotate your text to whatever bending y'all desire, you can free-transform your text box to rotate the text no differently than you lot would employ complimentary-transform for other editing in Photoshop. To activate gratis-transform on the text box, go to Edit > Free Transform or press Control+T (Command+T on a Mac), and motility the mouse pointer exterior the text box so that the mouse pointer looks similar a curved two-sided arrow. You tin so rotate the text past clicking and dragging with the mouse. If you need to limit the rotation to fifteen degree increments, and so concur downwards the shift key while you rotate the text with the mouse.
Have Fun!
Have fun with information technology! Experiment a chip, give the different options a try to see what you lot like. You'll exist able to wow your family and friends with another creative tool in your photo tool bag. And with the vacation flavor coming, you lot'll have a perfect opportunity to take your holiday photos to a whole new level. What are some things you'd like to give a effort with text in your images?

Source: https://improvephotography.com/50052/how-to-add-text-to-photos-in-photoshop/
Posted by: robinsonfrogivers38.blogspot.com
0 Response to "How To Add A Caption In Photoshop"
Post a Comment